
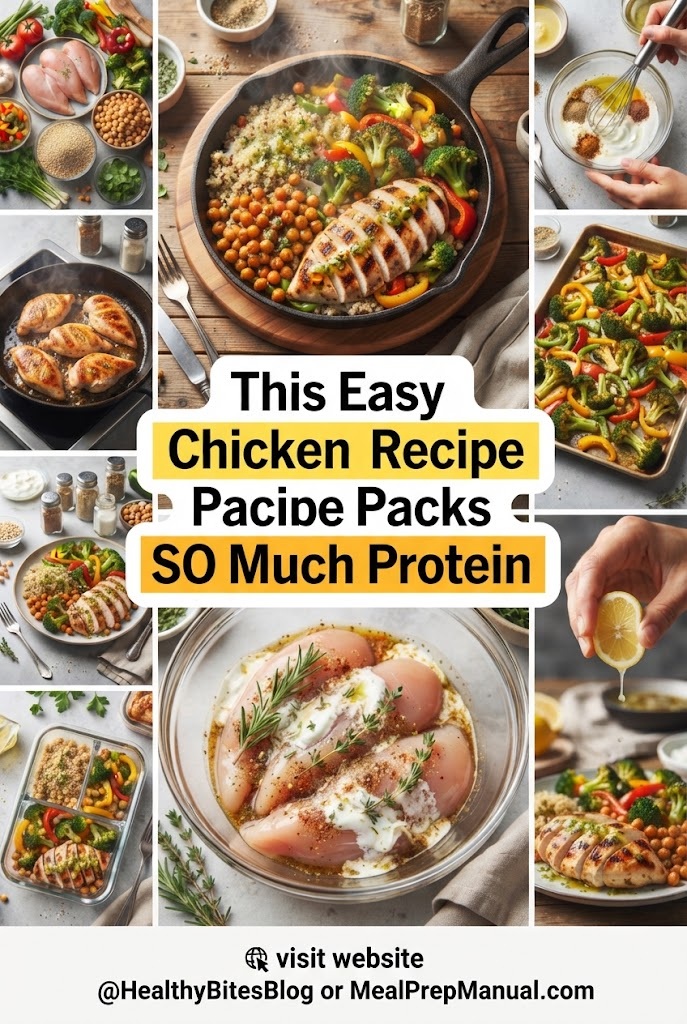
The Ultimate High-Protein Garlic Butter Herb Chicken: Your New Go-To Recipe for Muscle, Flavor, and Simplicity
Introduction: Why This Chicken Recipe is a Game-Changer
When it comes to healthy eating and fitness goals, chicken breast is the undisputed king of the kitchen. It is lean, packed with muscle-building protein, and affordable. However, chicken breast has earned a rather unfair reputation for being dry, rubbery, and utterly boring. Too many home cooks throw a plain chicken breast into a pan, cook it until it resembles leather, and wonder why they struggle to stick to a healthy eating routine.
What if you could enjoy a chicken dinner that is so juicy, tender, and intensely flavorful that it rivals your favorite restaurant, all while packing a massive protein punch?
Enter the Garlic Butter Herb Skillet Chicken. This recipe is specifically designed to maximize protein content while utilizing simple culinary techniques that lock in natural juices. Whether you are an avid athlete, a busy professional trying to hit your macro goals, or simply someone who loves incredible food, this comprehensive guide will walk you through everything you need to know to master this dish.
The Nutritional Power of Chicken: Why Protein Matters
Before diving into the kitchen, it is worth exploring why this recipe is such an exceptional addition to your meal rotation. Protein is an essential macronutrient required for almost every single function in the human body. It is made up of building blocks called amino acids, which our bodies use to repair tissues, build muscle, support immune function, and produce crucial hormones and enzymes.
1. Muscle Growth and Recovery
For anyone engaged in resistance training, weightlifting, or sports, adequate protein intake is non-negotiable. Muscle protein synthesis (MPS) must exceed muscle protein breakdown to build new muscle tissue. Chicken breast is a complete protein source, meaning it contains all nine essential amino acids that your body cannot synthesize on its own.
2. Satiety and Weight Management
Protein is the most satiating macronutrient. It takes longer to digest than carbohydrates or fats, and it triggers the release of satiety hormones (such as peptide YY and GLP-1) while suppressing ghrelin, the hunger hormone. Including a high-protein meal like this chicken recipe in your daily routine helps curb cravings, stabilize blood sugar, and keep you feeling fuller for longer, making caloric control effortless.
3. High Thermic Effect of Food (TEF)
The body actually expends energy to digest and process food. Protein has the highest thermic effect of all macronutrients—meaning your body burns roughly 20 to 30 percent of the calories consumed from protein simply during the digestion and metabolism process.
The Secret to Juiciness: Culinary Science Explained
Why do most home-cooked chicken breasts turn out dry? The answer lies in muscle fiber contraction and moisture evaporation.
When you apply high heat to chicken, the proteins (actin and myosin) tighten up. As they contract, they squeeze out the water trapped between the muscle fibers. Once the internal temperature climbs past 165°F (74°C) and stays there, almost all the moisture is forced out, leaving you with a chalky texture.
To combat this, our recipe utilizes three key steps:
- The Equal-Thickness Rule: Pounding the chicken breasts to an even thickness ensures that the thin tapering end doesn’t overcook while you wait for the thicker end to reach safety standards.
- The Sear and Baste Method: Searing creates a delicious, caramelized crust via the Maillard reaction, while basting with butter and olive oil infuses rich flavor and insulates the meat.
- The Rest Period: Resting cooked meat allows the muscle fibers to relax and reabsorb the juices that were pushed to the center during cooking. Cutting into chicken immediately after it leaves the pan is the fastest way to lose all its moisture onto the cutting board.
Complete Ingredients Form
Here is everything you need to bring this high-protein masterpiece to life. This recipe yields approximately 4 generous servings, with each serving packing over 45 grams of clean protein.
| Ingredient Category | Item Description | Quantity |
| Main Protein | Boneless, skinless chicken breasts | 4 large (approx. 2 lbs / 900g) |
| Fats & Oils | Extra virgin olive oil | 2 tablespoons |
| Fats & Oils | Unsalted butter | 2 tablespoons |
| Aromatics | Fresh garlic, minced | 4 cloves |
| Herbs & Spices | Smoked paprika | 1 teaspoon |
| Herbs & Spices | Garlic powder | 1 teaspoon |
| Herbs & Spices | Onion powder | 1/2 teaspoon |
| Herbs & Spices | Dried oregano or Italian seasoning | 1 teaspoon |
| Herbs & Spices | Kosher salt | 1 teaspoon |
| Herbs & Spices | Black pepper, freshly cracked | 1/2 teaspoon |
| Finishing Touches | Fresh rosemary sprigs | 2 sprigs |
| Finishing Touches | Fresh thyme sprigs | 4 sprigs |
| Finishing Touches | Fresh lemon juice (optional, for brightness) | 1 tablespoon |
Step-by-Step Cooking Instructions
Follow these precise steps to ensure your chicken turns out golden-brown on the outside and exceptionally juicy on the inside.
Step 1: Prep and Tenderize the Chicken
- Remove your chicken breasts from the refrigerator about 15 minutes before cooking. Bringing them slightly closer to room temperature ensures even cooking throughout.
- Pat the chicken completely dry with paper towels. Crucial tip: Moisture is the enemy of a good sear. Dry surface = golden crust.
- Place the chicken breasts on a cutting board. If they are unevenly thick, place a sheet of plastic wrap over them and gently use a meat mallet or a heavy skillet to pound the thicker end until the entire breast has a uniform thickness of about 3/4 inch.
Step 2: Mix the Dry Rub
- In a small mixing bowl, combine the kosher salt, black pepper, smoked paprika, garlic powder, onion powder, and dried oregano. Stir well with a fork to blend the spices evenly.
Step 3: Season Generously
- Drizzle the olive oil evenly over both sides of the chicken breasts, rubbing it in with your hands to coat them completely.
- Sprinkle the spice mixture over the chicken, pressing it gently into the meat so it adheres. Ensure both sides and the edges are well-seasoned.
Step 4: The Sear
- Place a large cast-iron skillet or heavy-bottomed stainless-steel pan over medium-high heat. Allow the pan to heat up completely for 2 to 3 minutes until it is hot and shimmering.
- Lay the chicken breasts into the hot pan, leaving a little space between each piece. You should hear a satisfying, loud sizzle immediately.
- Do not move the chicken! Let it sear undisturbed for 5 to 6 minutes. You are looking for a deep, golden-brown crust to form on the bottom.
Step 5: Butter Basting and Flipping
- Flip the chicken breasts over.
- Immediately drop the heat down to medium-low.
- Add the unsalted butter, minced garlic, fresh rosemary sprigs, and fresh thyme sprigs directly into the pan alongside the chicken.
- As the butter melts and foams, tilt the pan slightly and use a large spoon to scoop up the melted herb-infused butter, continuously spooning (basting) it over the top of the chicken breasts. This infuses incredible flavor and keeps the meat moist.
- Continue cooking for another 4 to 6 minutes, or until an instant-read meat thermometer inserted into the thickest part of the chicken registers 165°F (74°C).
Step 6: Rest and Serve
- Transfer the cooked chicken breasts to a warm cutting board or a plate.
- Pour any remaining garlic butter from the skillet directly over the top of the chicken.
- Loosely tent a piece of aluminum foil over the chicken and let it rest for 5 to 7 minutes. Do not skip this step!
- Slice against the grain into thick medallions and serve hot with your favorite side dishes.
Nutritional Breakdown Per Serving
To help you track your daily macros and fitness goals, here is the estimated nutritional breakdown per serving (based on 4 total servings):
- Calories: ~310 kcal
- Protein: ~48g
- Total Fat: ~12g
- Saturated Fat: ~4.5g
- Carbohydrates: ~2g
- Dietary Fiber: ~0.5g
- Sugars: ~0g
- Sodium: ~650mg (depending on salt usage)
Customization and Pairing Ideas
One of the greatest benefits of this recipe is its versatility. It serves as a blank canvas that pairs wonderfully with a wide variety of healthy carbohydrates and fibrous vegetables.
1. Low-Carb & Keto Pairings
- Garlic Butter Asparagus: Toss asparagus spears in the leftover pan juices after removing the chicken.
- Cauliflower Mash: A creamy, buttery substitute for mashed potatoes that absorbs any leftover pan sauce brilliantly.
- Zucchini Noodles: Sautéed quickly in olive oil and garlic.
2. Performance & Muscle-Building Pairings
- Jasmine Rice or Quinoa: Clean, fast-digesting carbohydrates that replenish glycogen stores post-workout.
- Roasted Sweet Potato Wedges: Packed with complex carbohydrates, potassium, and beta-carotene.
- Steamed Broccoli or Green Beans: High in micronutrients and fiber to aid digestion.
Pro-Tips for Meal Prep Success
If you are someone who likes to prep meals ahead of time for the busy work week, this recipe holds up exceptionally well.
- Batch Cooking: You can easily double or triple this recipe. If your pan isn’t large enough, cook the chicken in batches. Never crowd the pan, or the chicken will steam instead of sear.
- Storage: Store cooked, sliced chicken in an airtight glass container in the refrigerator for up to 4 days.
- Reheating Tip: To prevent dry chicken when reheating, sprinkle a tablespoon of water or chicken broth over the chicken, cover the container with a damp paper towel, and microwave on medium power (50-70% power) in 30-second increments until warm. Alternatively, reheat gently in a covered skillet over low heat.
Frequently Asked Questions (FAQ)
Q: Can I use frozen chicken breasts?
A: It is strongly recommended to thaw your chicken breasts completely in the refrigerator before cooking. Cooking frozen chicken in a skillet results in uneven cooking—the outside will burn or overcook while the center remains raw and cold.
Q: What if I don’t have a cast-iron skillet?
A: Any heavy-bottomed skillet (such as stainless steel or even a quality non-stick pan) will work. Cast iron is preferred because it retains and distributes heat exceptionally well, creating a superior sear.
Q: Can I use chicken thighs instead?
A: Absolutely! Boneless, skinless chicken thighs are even juicier than chicken breasts and harder to overcook due to their higher fat content. Follow the exact same cooking steps, but note that thighs may take slightly longer (about 7–9 minutes per side) to cook through.
Conclusion
Eating healthy and hitting your high-protein goals does not mean you have to suffer through dry, flavorless meals. By combining simple culinary techniques—like proper meat preparation, high-heat searing, and rich butter basting—you can transform a humble chicken breast into a gourmet dining experience. Try this recipe out for your next meal prep or weeknight dinner, and experience just how delicious clean eating can truly be!
What side dish are you planning to pair with this high-protein garlic butter chicken?The Ultimate High-Protein Garlic Butter Herb Chicken: Your New Go-To Recipe for Muscle, Flavor, and Simplicity
Introduction: Why This Chicken Recipe is a Game-Changer
When it comes to healthy eating and fitness goals, chicken breast is the undisputed king of the kitchen. It is lean, packed with muscle-building protein, and affordable. However, chicken breast has earned a rather unfair reputation for being dry, rubbery, and utterly boring. Too many home cooks throw a plain chicken breast into a pan, cook it until it resembles leather, and wonder why they struggle to stick to a healthy eating routine.
What if you could enjoy a chicken dinner that is so juicy, tender, and intensely flavorful that it rivals your favorite restaurant, all while packing a massive protein punch?
Enter the Garlic Butter Herb Skillet Chicken. This recipe is specifically designed to maximize protein content while utilizing simple culinary techniques that lock in natural juices. Whether you are an avid athlete, a busy professional trying to hit your macro goals, or simply someone who loves incredible food, this comprehensive guide will walk you through everything you need to know to master this dish.
The Nutritional Power of Chicken: Why Protein Matters
Before diving into the kitchen, it is worth exploring why this recipe is such an exceptional addition to your meal rotation. Protein is an essential macronutrient required for almost every single function in the human body. It is made up of building blocks called amino acids, which our bodies use to repair tissues, build muscle, support immune function, and produce crucial hormones and enzymes.
1. Muscle Growth and Recovery
For anyone engaged in resistance training, weightlifting, or sports, adequate protein intake is non-negotiable. Muscle protein synthesis (MPS) must exceed muscle protein breakdown to build new muscle tissue. Chicken breast is a complete protein source, meaning it contains all nine essential amino acids that your body cannot synthesize on its own.
2. Satiety and Weight Management
Protein is the most satiating macronutrient. It takes longer to digest than carbohydrates or fats, and it triggers the release of satiety hormones (such as peptide YY and GLP-1) while suppressing ghrelin, the hunger hormone. Including a high-protein meal like this chicken recipe in your daily routine helps curb cravings, stabilize blood sugar, and keep you feeling fuller for longer, making caloric control effortless.
3. High Thermic Effect of Food (TEF)
The body actually expends energy to digest and process food. Protein has the highest thermic effect of all macronutrients—meaning your body burns roughly 20 to 30 percent of the calories consumed from protein simply during the digestion and metabolism process.
The Secret to Juiciness: Culinary Science Explained
Why do most home-cooked chicken breasts turn out dry? The answer lies in muscle fiber contraction and moisture evaporation.
When you apply high heat to chicken, the proteins (actin and myosin) tighten up. As they contract, they squeeze out the water trapped between the muscle fibers. Once the internal temperature climbs past 165°F (74°C) and stays there, almost all the moisture is forced out, leaving you with a chalky texture.
To combat this, our recipe utilizes three key steps:
- The Equal-Thickness Rule: Pounding the chicken breasts to an even thickness ensures that the thin tapering end doesn’t overcook while you wait for the thicker end to reach safety standards.
- The Sear and Baste Method: Searing creates a delicious, caramelized crust via the Maillard reaction, while basting with butter and olive oil infuses rich flavor and insulates the meat.
- The Rest Period: Resting cooked meat allows the muscle fibers to relax and reabsorb the juices that were pushed to the center during cooking. Cutting into chicken immediately after it leaves the pan is the fastest way to lose all its moisture onto the cutting board.
Complete Ingredients Form
Here is everything you need to bring this high-protein masterpiece to life. This recipe yields approximately 4 generous servings, with each serving packing over 45 grams of clean protein.
| Ingredient Category | Item Description | Quantity |
| Main Protein | Boneless, skinless chicken breasts | 4 large (approx. 2 lbs / 900g) |
| Fats & Oils | Extra virgin olive oil | 2 tablespoons |
| Fats & Oils | Unsalted butter | 2 tablespoons |
| Aromatics | Fresh garlic, minced | 4 cloves |
| Herbs & Spices | Smoked paprika | 1 teaspoon |
| Herbs & Spices | Garlic powder | 1 teaspoon |
| Herbs & Spices | Onion powder | 1/2 teaspoon |
| Herbs & Spices | Dried oregano or Italian seasoning | 1 teaspoon |
| Herbs & Spices | Kosher salt | 1 teaspoon |
| Herbs & Spices | Black pepper, freshly cracked | 1/2 teaspoon |
| Finishing Touches | Fresh rosemary sprigs | 2 sprigs |
| Finishing Touches | Fresh thyme sprigs | 4 sprigs |
| Finishing Touches | Fresh lemon juice (optional, for brightness) | 1 tablespoon |
Step-by-Step Cooking Instructions
Follow these precise steps to ensure your chicken turns out golden-brown on the outside and exceptionally juicy on the inside.
Step 1: Prep and Tenderize the Chicken
- Remove your chicken breasts from the refrigerator about 15 minutes before cooking. Bringing them slightly closer to room temperature ensures even cooking throughout.
- Pat the chicken completely dry with paper towels. Crucial tip: Moisture is the enemy of a good sear. Dry surface = golden crust.
- Place the chicken breasts on a cutting board. If they are unevenly thick, place a sheet of plastic wrap over them and gently use a meat mallet or a heavy skillet to pound the thicker end until the entire breast has a uniform thickness of about 3/4 inch.
Step 2: Mix the Dry Rub
- In a small mixing bowl, combine the kosher salt, black pepper, smoked paprika, garlic powder, onion powder, and dried oregano. Stir well with a fork to blend the spices evenly.
Step 3: Season Generously
- Drizzle the olive oil evenly over both sides of the chicken breasts, rubbing it in with your hands to coat them completely.
- Sprinkle the spice mixture over the chicken, pressing it gently into the meat so it adheres. Ensure both sides and the edges are well-seasoned.
Step 4: The Sear
- Place a large cast-iron skillet or heavy-bottomed stainless-steel pan over medium-high heat. Allow the pan to heat up completely for 2 to 3 minutes until it is hot and shimmering.
- Lay the chicken breasts into the hot pan, leaving a little space between each piece. You should hear a satisfying, loud sizzle immediately.
- Do not move the chicken! Let it sear undisturbed for 5 to 6 minutes. You are looking for a deep, golden-brown crust to form on the bottom.
Step 5: Butter Basting and Flipping
- Flip the chicken breasts over.
- Immediately drop the heat down to medium-low.
- Add the unsalted butter, minced garlic, fresh rosemary sprigs, and fresh thyme sprigs directly into the pan alongside the chicken.
- As the butter melts and foams, tilt the pan slightly and use a large spoon to scoop up the melted herb-infused butter, continuously spooning (basting) it over the top of the chicken breasts. This infuses incredible flavor and keeps the meat moist.
- Continue cooking for another 4 to 6 minutes, or until an instant-read meat thermometer inserted into the thickest part of the chicken registers 165°F (74°C).
Step 6: Rest and Serve
- Transfer the cooked chicken breasts to a warm cutting board or a plate.
- Pour any remaining garlic butter from the skillet directly over the top of the chicken.
- Loosely tent a piece of aluminum foil over the chicken and let it rest for 5 to 7 minutes. Do not skip this step!
- Slice against the grain into thick medallions and serve hot with your favorite side dishes.
Nutritional Breakdown Per Serving
To help you track your daily macros and fitness goals, here is the estimated nutritional breakdown per serving (based on 4 total servings):
- Calories: ~310 kcal
- Protein: ~48g
- Total Fat: ~12g
- Saturated Fat: ~4.5g
- Carbohydrates: ~2g
- Dietary Fiber: ~0.5g
- Sugars: ~0g
- Sodium: ~650mg (depending on salt usage)
Customization and Pairing Ideas
One of the greatest benefits of this recipe is its versatility. It serves as a blank canvas that pairs wonderfully with a wide variety of healthy carbohydrates and fibrous vegetables.
1. Low-Carb & Keto Pairings
- Garlic Butter Asparagus: Toss asparagus spears in the leftover pan juices after removing the chicken.
- Cauliflower Mash: A creamy, buttery substitute for mashed potatoes that absorbs any leftover pan sauce brilliantly.
- Zucchini Noodles: Sautéed quickly in olive oil and garlic.
2. Performance & Muscle-Building Pairings
- Jasmine Rice or Quinoa: Clean, fast-digesting carbohydrates that replenish glycogen stores post-workout.
- Roasted Sweet Potato Wedges: Packed with complex carbohydrates, potassium, and beta-carotene.
- Steamed Broccoli or Green Beans: High in micronutrients and fiber to aid digestion.
Pro-Tips for Meal Prep Success
If you are someone who likes to prep meals ahead of time for the busy work week, this recipe holds up exceptionally well.
- Batch Cooking: You can easily double or triple this recipe. If your pan isn’t large enough, cook the chicken in batches. Never crowd the pan, or the chicken will steam instead of sear.
- Storage: Store cooked, sliced chicken in an airtight glass container in the refrigerator for up to 4 days.
- Reheating Tip: To prevent dry chicken when reheating, sprinkle a tablespoon of water or chicken broth over the chicken, cover the container with a damp paper towel, and microwave on medium power (50-70% power) in 30-second increments until warm. Alternatively, reheat gently in a covered skillet over low heat.
Frequently Asked Questions (FAQ)
Q: Can I use frozen chicken breasts?
A: It is strongly recommended to thaw your chicken breasts completely in the refrigerator before cooking. Cooking frozen chicken in a skillet results in uneven cooking—the outside will burn or overcook while the center remains raw and cold.
Q: What if I don’t have a cast-iron skillet?
A: Any heavy-bottomed skillet (such as stainless steel or even a quality non-stick pan) will work. Cast iron is preferred because it retains and distributes heat exceptionally well, creating a superior sear.
Q: Can I use chicken thighs instead?
A: Absolutely! Boneless, skinless chicken thighs are even juicier than chicken breasts and harder to overcook due to their higher fat content. Follow the exact same cooking steps, but note that thighs may take slightly longer (about 7–9 minutes per side) to cook through.
Conclusion
Eating healthy and hitting your high-protein goals does not mean you have to suffer through dry, flavorless meals. By combining simple culinary techniques—like proper meat preparation, high-heat searing, and rich butter basting—you can transform a humble chicken breast into a gourmet dining experience. Try this recipe out for your next meal prep or weeknight dinner, and experience just how delicious clean eating can truly be!
What side dish are you planning to pair with this high-protein garlic butter chicken?