
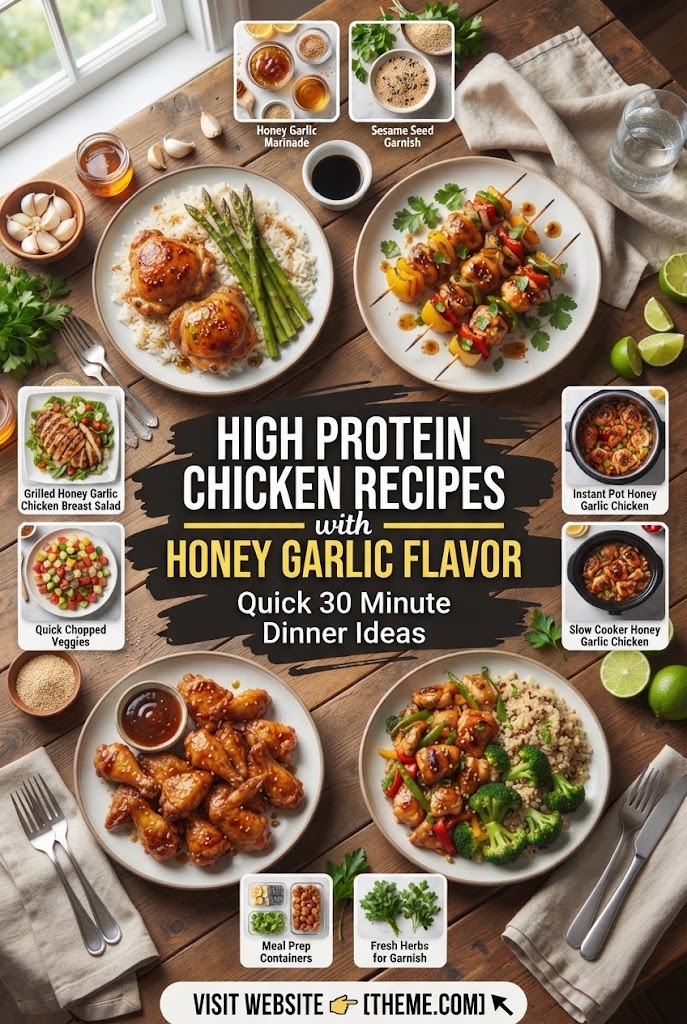
In the fast-paced world of modern living, the intersection of nutrition, flavor, and convenience is often where most home cooks struggle. We want meals that fuel our bodies, satisfy our cravings for something gourmet, and, most importantly, don’t require hours of slaving over a hot stove. Enter the legendary flavor profile: Honey Garlic.
This combination is a culinary powerhouse. The floral sweetness of honey balances the pungent, earthy sharpness of fresh garlic, creating a glaze that clings to protein like a second skin. When applied to high-quality chicken, you get a meal that is packed with lean protein, essential amino acids, and a taste profile that rivals any high-end takeout.
In this comprehensive guide, we are exploring five distinct ways to prepare Honey Garlic Chicken, all designed to be completed in under 30 minutes, ensuring your fitness goals and your schedule remain perfectly aligned.
The Nutritional Profile: Why High Protein?
Before we dive into the pans and whisks, it is vital to understand why we prioritize protein. Protein is the building block of muscle, skin, and enzymes. For those engaging in resistance training or simply looking to manage weight, a high-protein diet increases satiety (the feeling of fullness) and boosts the thermic effect of food, meaning your body burns more calories just digesting protein than it does fats or carbohydrates.
By using chicken—specifically breast and thigh meat—we tap into a lean source of protein that acts as a canvas for the robust honey garlic sauce.
Core Ingredients Detail (Form Shape)
To achieve the perfect balance of flavor, you need specific ingredients. Below is the master list used across our recipes, organized by their functional role in the dish.
| Ingredient Category | Item | Form/Type | Purpose |
|---|---|---|---|
| Primary Protein | Chicken Breast | Boneless, Skinless Cubes | Lean, high-volume protein. |
| Chicken Thighs | Boneless, Skinless Strips | Juicy, flavor-rich protein. | |
| Ground Chicken | 93% Lean | For quick-cooking bowls. | |
| The Sweetener | Raw Honey | Liquid/Clear | Provides the base for the glaze. |
| Brown Sugar | Packed (Optional) | Adds a deep molasses undertone. | |
| The Aromatics | Fresh Garlic | Minced or Pressed | The heart of the flavor profile. |
| Fresh Ginger | Grated | Adds a spicy, citrusy zing. | |
| Green Onions | Thinly Sliced | Freshness and color. | |
| The Umami/Salt | Soy Sauce | Low Sodium | Provides salt and deep color. |
| Liquid Aminos | Soy-Free Alternative | A gluten-free, healthy swap. | |
| Sesame Oil | Toasted | Adds a nutty, smoky finish. | |
| Acidity | Apple Cider Vinegar | Raw/Unfiltered | Cuts through the sweetness. |
| Rice Vinegar | Unseasoned | A milder, traditional Asian acidity. | |
| Fresh Lime/Lemon | Juiced | Brightens the heavy glaze. | |
| Thickener | Cornstarch | Powdered | Creates the “shiny” coating. |
| Arrowroot Powder | Paleo Alternative | Natural thickener. |
Recipe 1: The 15-Minute Honey Garlic Chicken Breast Bites
This is the gold standard for quick weeknight dinners. By cubing the chicken, you increase the surface area, allowing it to cook faster and soak up more sauce.
Ingredients Detail (Form Shape)
- Chicken: 1.5 lbs Chicken Breast, cut into 1-inch cubes.
- Seasoning: 1/2 tsp Salt, 1/2 tsp Black Pepper, 1/2 tsp Garlic Powder.
- Sauce Base: 1/3 cup Honey, 3 tbsp Soy Sauce (Low Sodium).
- Aromatics: 4 cloves Garlic (Minced), 1 tsp Fresh Ginger (Grated).
- Fat: 1 tbsp Olive Oil or Avocado Oil.
- Garnish: Sesame seeds and chopped green onions.
Step-by-Step Instructions
- Prep the Chicken: Pat the chicken cubes dry with a paper towel. This is crucial for getting a good sear. Toss the cubes in a bowl with salt, pepper, and garlic powder until evenly coated.
- Whisk the Sauce: In a small glass jar or bowl, combine the honey, soy sauce, minced garlic, and grated ginger. Whisk until the honey is fully incorporated into the liquid.
- The Sear: Heat a large non-stick skillet over medium-high heat. Add the oil. Once the oil is shimmering, add the chicken in a single layer. Do not crowd the pan; cook in two batches if necessary. Let the chicken sit undisturbed for 2-3 minutes to develop a golden-brown crust, then flip and cook for another 2 minutes.
- Glaze Application: Pour the prepared honey garlic sauce over the chicken in the pan. The sauce will immediately begin to bubble.
- The Reduction: Reduce the heat to medium. Stir the chicken constantly for 2-3 minutes. As the water in the sauce evaporates, the sugars in the honey will caramelize, creating a thick, sticky glaze that coats every piece of chicken.
- Finish and Serve: Once the sauce has reached your desired thickness and the chicken is cooked through (internal temp of 165°F), remove from heat. Serve over a bed of steamed jasmine rice or quinoa. Garnish with sesame seeds.
Recipe 2: Crispy Honey Garlic Chicken Thighs (One-Pan Wonder)
For those who prefer a juicier, more succulent piece of meat, chicken thighs are the way to go. This recipe uses a light dusting of flour/cornstarch to create a crispy exterior without deep frying.
Ingredients Detail (Form Shape)
- Chicken: 1.5 lbs Boneless Skinless Chicken Thighs, sliced into strips.
- Coating: 2 tbsp Cornstarch or All-Purpose Flour.
- Sauce: 1/4 cup Honey, 2 tbsp Soy Sauce, 1 tbsp Rice Vinegar, 1 tsp Sriracha (for a kick).
- Aromatics: 5 cloves Garlic (Minced).
- Fat: 2 tbsp Neutral oil (Grapeseed or Vegetable).
Step-by-Step Instructions
- Dredge the Protein: Place the chicken thigh strips in a large bowl and sprinkle with cornstarch. Toss thoroughly until each piece is lightly and evenly coated. This starch will react with the oil to create a “crunch” and will later help thicken the sauce.
- The High-Heat Sear: Heat the oil in a wide skillet until very hot. Add the chicken strips. Allow them to fry for about 4 minutes per side. You are looking for a deep golden-brown color and a crispy texture.
- Drain Excess Fat: If the thighs released a lot of fat, carefully spoon out the excess, leaving about a teaspoon in the pan for flavor.
- Sauce Infusion: In a small bowl, mix the honey, soy sauce, rice vinegar, sriracha, and minced garlic.
- The Sizzle: Pour the mixture into the hot pan. It will sizzle violently—this is good! The starch on the chicken will immediately begin to bond with the sauce.
- Tossing: Use tongs to toss the crispy chicken in the bubbling sauce for about 60 seconds. The sauce should turn into a thick, mahogany-colored lacquer.
- Plate Up: Serve immediately while the chicken is still crispy. This pairs exceptionally well with steamed broccoli or snap peas.
Recipe 3: Ground Honey Garlic Chicken & Pepper Bowls
Perfect for meal prep, ground chicken is the fastest-cooking protein option. This recipe incorporates bell peppers for added volume, fiber, and micronutrients.
Ingredients Detail (Form Shape)
- Chicken: 1 lb Lean Ground Chicken.
- Vegetables: 2 Bell Peppers (Red and Green), diced small; 1/2 Yellow Onion, finely chopped.
- Sauce: 3 tbsp Honey, 3 tbsp Soy Sauce, 1 tbsp Toasted Sesame Oil.
- Aromatics: 3 cloves Garlic (Minced), 1/2 tsp Crushed Red Pepper Flakes.
- Liquid: 1/4 cup Water or Chicken Broth.
Step-by-Step Instructions
- Sauté the Aromatics: In a large skillet or wok, heat a drizzle of oil over medium heat. Add the onions and bell peppers. Sauté for 3-4 minutes until they begin to soften and the onions turn translucent.
- Brown the Meat: Push the vegetables to the side of the pan and add the ground chicken to the center. Increase heat to medium-high. Use a wooden spoon to break the chicken into small crumbles. Cook until no pink remains.
- The Sauce Mix: While the meat browns, whisk together the honey, soy sauce, sesame oil, and red pepper flakes.
- Combine: Mix the vegetables back in with the chicken. Pour the sauce over the entire mixture.
- Simmer: Add the 1/4 cup of water or broth. This prevents the honey from burning and allows the flavors to meld as the liquid reduces. Simmer for 5 minutes.
- Assembly: Scoop the mixture into bowls over cauliflower rice (for a low-carb option) or brown rice. The ground chicken absorbs the honey garlic flavor more intensely than whole cuts, making every bite an explosion of flavor.
Recipe 4: Honey Garlic Chicken Stir-Fry with Cashews
This recipe introduces texture through roasted cashews, adding healthy fats and a satisfying crunch to the high-protein dish.
Ingredients Detail (Form Shape)
- Chicken: 1.5 lbs Chicken Breast, thinly sliced into “stir-fry” strips.
- Vegetables: 2 cups Broccoli florets, 1 cup Sliced Carrots.
- The Crunch: 1/2 cup Roasted Unsalted Cashews.
- The Glaze: 1/4 cup Honey, 1/4 cup Soy Sauce, 1 tbsp Rice Vinegar, 1 tsp Cornstarch.
- Aromatics: 4 cloves Garlic, 1 tbsp Ginger Paste.
Step-by-Step Instructions
- Steam-Sauté the Veggies: Add 2 tablespoons of water to a hot skillet and toss in the broccoli and carrots. Cover with a lid for 2 minutes to “steam” them quickly. Remove and set aside.
- Flash-Cook the Chicken: Wipe the skillet dry. Add oil and the chicken strips. Sauté on high heat for 4-5 minutes until cooked through.
- Make the Slurry: In a small cup, whisk the honey, soy sauce, vinegar, garlic, ginger, and cornstarch. The cornstarch is essential here to handle the moisture from the vegetables.
- The Great Merge: Add the steamed vegetables and the cashews back into the skillet with the chicken.
- Thicken: Pour the sauce over the mixture. Stir constantly over high heat. The sauce will turn from a thin liquid to a thick, glossy coating in about 45 seconds.
- Garnish: Top with extra green onions and serve. The cashews provide a buttery contrast to the sweet and salty sauce.
The Science of the Perfect Honey Garlic Sauce
To master these 30-minute meals, one must understand the chemistry of the sauce.
1. The Role of Honey
Honey is a humectant, meaning it attracts and retains moisture. In a hot pan, honey undergoes two processes: evaporation and caramelization. As the water content leaves the honey, the sugars concentrate. If cooked too long, it will turn into a bitter, burnt mess. The key is to add the honey-based sauce only when the chicken is 90% cooked.
2. The Garlic Impact
Garlic contains sulfur compounds that change flavor based on how they are handled.
- Minced Garlic: Provides a strong, punchy flavor.
- Sliced Garlic: Offers a milder, nutty sweetness.
- Pressed Garlic: Releases the most oils, making the sauce very pungent. For these recipes, mincing is preferred as it distributes the flavor evenly through the thick glaze.
3. Balancing with Acidity
A common mistake in honey garlic recipes is making them too sweet. To counter the 1/3 cup of honey, you must have an acid. Rice vinegar or apple cider vinegar provides a “bright” note that cuts through the sugar, making the dish feel lighter and more complex.
High Protein Side Dish Pairings
While the chicken is the star, what you serve it with can enhance the protein content and nutritional value of the meal.
- Quinoa: Unlike rice, quinoa is a complete protein containing all nine essential amino acids. It has a slightly nutty flavor that complements the honey garlic glaze beautifully.
- Edamame: Serving a side of steamed edamame adds a significant boost of plant-based protein and fiber.
- Roasted Brussels Sprouts: The charred, bitter notes of roasted sprouts are the perfect foil for the sweet chicken.
- Cauliflower Rice: For those looking to keep calories low while keeping protein high, cauliflower rice allows you to eat a larger volume of food without the heavy carbohydrate load.
Meal Prep and Storage Secrets
Honey Garlic Chicken is one of the best “reheat” meals because the glaze protects the chicken from drying out in the microwave.
- Fridge Life: These dishes stay fresh and flavorful for up to 4 days in an airtight container.
- Freezing: You can freeze the cooked chicken and sauce. When reheating, add a splash of water to loosen the glaze.
- Cold Serving: Interestingly, the honey garlic chicken strips are excellent served cold over a massaged kale salad the next day.
Frequently Asked Questions (FAQ)
Can I use Garlic Powder instead of Fresh Garlic?
While fresh is superior for that signature “honey garlic” bite, you can substitute 1/4 teaspoon of garlic powder for every clove of fresh garlic. However, the texture of the sauce will be smoother and less “rustic.”
Is this recipe Gluten-Free?
Standard soy sauce contains wheat. To make these recipes 100% gluten-free, substitute the soy sauce with Tamari or Coconut Aminos. Coconut aminos are slightly sweeter, so you may want to reduce the honey by a tablespoon.
My sauce is too thin, what do I do?
If your sauce isn’t thickening, it’s usually because there isn’t enough heat or a thickener. Increase the heat to high for 60 seconds to boil off excess water. If that fails, mix 1 tsp of cornstarch with 1 tsp of cold water (a slurry) and stir it into the bubbling sauce.
How do I prevent the honey from burning?
The most common mistake is adding the sauce to a dry, scorching hot pan and letting it sit. Always ensure there is a little liquid (like soy sauce or a splash of broth) mixed with the honey, and keep the ingredients moving in the pan.
The Advanced Technique: Velveting Chicken
If you want your chicken to have that incredibly soft, tender texture found in high-end Chinese restaurants, you can “velvet” it before cooking.
The Process:
- Thinly slice your chicken.
- Toss with 1 egg white, 1 tbsp cornstarch, and 1 tbsp rice vinegar.
- Let it sit for 20 minutes in the fridge.
- Par-boil the chicken in water or oil for 60 seconds before stir-frying.
This creates a protective barrier around the protein, preventing the fibers from tightening up and becoming “rubbery” during the high-heat cooking required for honey garlic glazes.
Variations for Special Diets
- For the Keto Diet: Replace the honey with a sugar-free maple syrup or a keto-friendly honey substitute (usually made from monk fruit or allulose). Increase the garlic and ginger to compensate for the loss of natural honey flavor.
- For the Paleo Diet: Use raw honey, coconut aminos, and arrowroot powder as the thickener. Use avocado oil for cooking.
- For the Low-Sodium Diet: Use only “No Salt Added” chicken broth and a minimal amount of liquid aminos. Increase the lime juice and fresh ginger to provide flavor without the salt.
Essential Kitchen Tools for 30-Minute Dinners
To truly master the 30-minute window, your kitchen environment matters.
- Cast Iron Skillet: This holds heat better than any other material. It’s perfect for getting that deep sear on the chicken breast cubes.
- Microplane Grater: Essential for grating fresh ginger and garlic into a paste, which allows them to dissolve seamlessly into the honey glaze.
- High-Quality Tongs: You need precision to flip individual pieces of chicken to ensure even browning.
- Meat Thermometer: To ensure your chicken is safe but not overcooked. 165°F is the magic number.
Final Thoughts on the Honey Garlic Method
The beauty of the Honey Garlic flavor profile lies in its simplicity. With just a few pantry staples, you can transform lean, arguably “boring” chicken into a restaurant-quality meal. By focusing on high-protein preparations and utilizing the 30-minute cooking window, you eliminate the excuses that lead to poor dietary choices.
Whether you are cubing breasts for a quick lunch, frying thighs for a family dinner, or prepping ground chicken for the week ahead, the balance of sweet, salty, and pungent garlic is a guaranteed crowd-pleaser.
Experiment with the ratios—more garlic for a savory kick, more honey for a sticky treats-style finish, or extra chili flakes for a spicy “Hot Honey” variation. Once you master the basic glaze, the possibilities for high-protein, quick-fix dinners are endless.